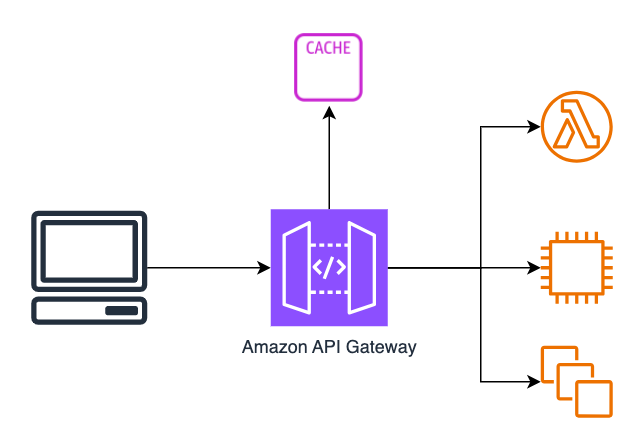
Using API Gateway caching
If your API Gateway receives a high number of GET requests for the same data you can improve performance and reduce costs by enabling the API Gateway built-in cache. Using a cache can significantly reduce the load on your backend resources such as EC2 instances, containers, Lambda functions and databases. The less you use these backend resources, the less they scale, and the less it will cost you.
In this article I will show you how to enable and configure API Gateway caching, how to flush or invalidate the cache, and any gotchas.
Cache is an hourly charge!
First things first, I should make it clear that unlike API Gateway, Lambda and many other serverless services which work on ‘per-request’ pricing, API Gateway cache is priced per hour. The price varies based on the GB size of the cache you specify.
This means even if you do not use your API for a period of time, you will still get charged. You should first do a cost/benefit analysis on whether the cache will work for your use case.
As an example the smallest cache instance will cost $14.60 a month in the us-east-1 region, regardless of how much you use it.
See the API Gateway pricing page for more details.
How do you enable caching?
Enabling caching for API Gateway is simple. You enable caching on a particular stage, for example on /prod/ or /v1/.
- Create an API Gateway REST API as normal.
- Deploy the API to a stage.
- Select the stage and click
EditunderStage details. - Enable the cache under
Additional settings.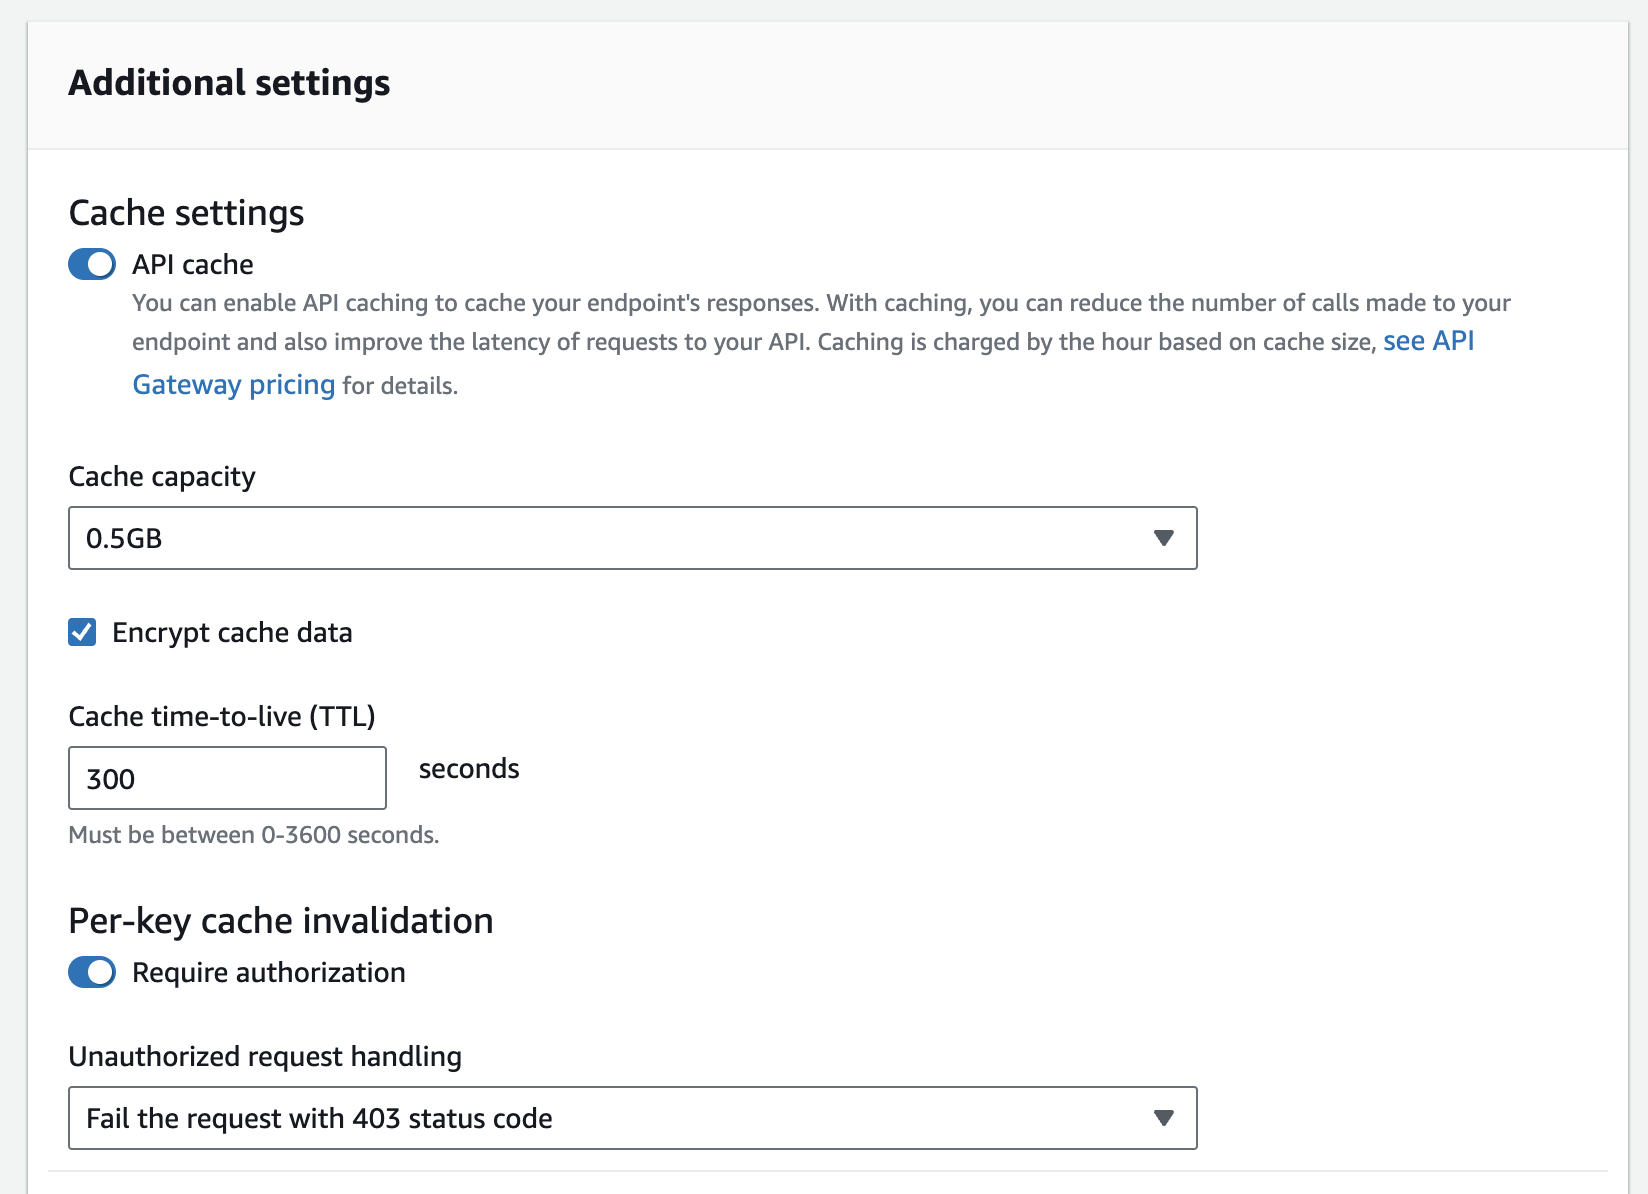
Enabling the cache takes up to 4 minutes as a dedicated cache instance has to be deployed behind the scenes.
Cache settings explained
Cache Capacity
The size of the cache decides the hourly price you pay. The larger the cache the better the performance and the more data you can hold in memory.
Valid cache sizes are: 0.5 GB | 1.6 GB | 6.1 GB | 13.5 GB | 28.4 GB | 58.2 GB | 118 GB | 237 GB
An important note here is that the cache capacity impacts the CPU, memory and network bandwidth the cache instance. So a larger cache maybe more performant even if you do not require the full cache storage.
Encrypt cache data
This does exactly what it says! Your cached data will be encrypted at rest on the cache instance using AES 256-bit keys. This is just on/off. There is no option to use your own AWS KMS key at the moment.
Cache time-to-live (TTL)
Specifies the duration (in seconds) the cache entry should be valid for. Can be between 0 (cache disabled) and 3600 (60 mins).
Per-key cache invalidation
A client can invalidate a cache entry by sending a request that contains the Cache-Control: max-age=0 HTTP header.
If you do not enable Require authorization then any anonymous client can invalidate the cache entry and force a reload from the backend.
Enabling the Require authorization setting means only IAM authorized identities can pass the header and invalidate the cache entry. The requester much have the execute-api:InvalidateCache permission.
Authorized request handling
If you enable the Require authorization setting then you will have to select how to handle requests which attempt to clear the cache using the Cache-Control: max-age=0 HTTP header, but are not allowed to. You have the following options:
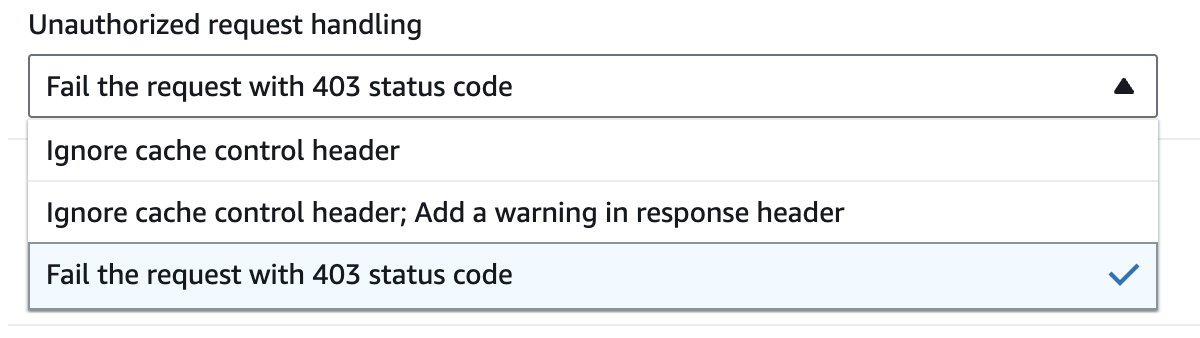
Fail the request with 403 status code: returns a 403 Unauthorized response.
Ignore cache control header: Add a warning in response header and process the request without clearing the cache.
Ignore cache control header: process the request and do not add a warning header in the response.
Method level caching
When you enable the API Gateway caching at the stage level, it will automatically enable on all GET methods for that stage. You can disable the cache on individual GET methods, or adjust the TTL value to override the stage level default. You can also enable caching on non-GET methods if required.
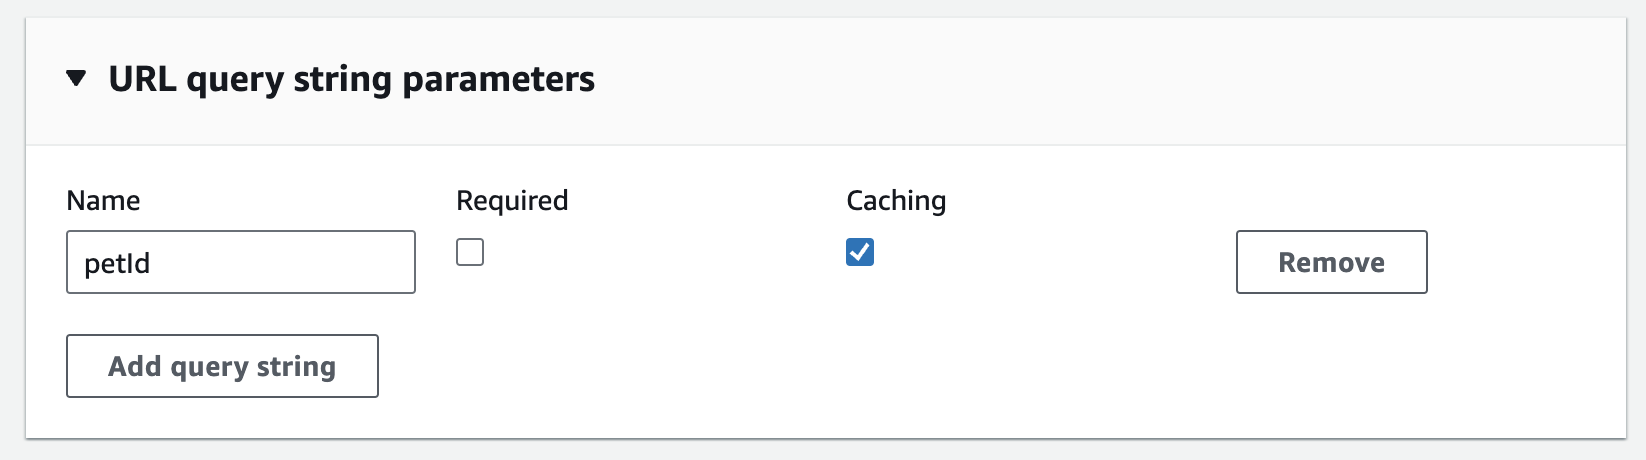
Cache keys
If your API accepts parameters e.g. HTTP Headers, URL paths or query strings you can use these to form a cache key. This makes sure that the same requests return the same data.
For example GET /prod/pet?id=123 will return different results to GET /prod/pet?petId=987 therefore the petId query string should be included in the cache key.
To do this add the URL query string and enable Caching under the method request settings.
An example!
Let’s see the cache in action! Introducing the simple pets API. It uses a Lambda function to return all the pets in the DynamoDB table.
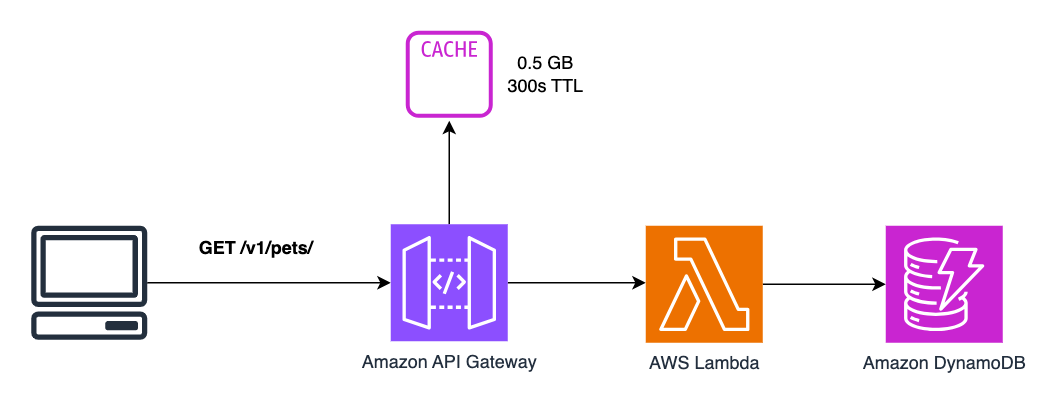
Here’s my Lambda function code. Note I have included the timestamp to help us determine if results are returned from the cache or not…
import json
import boto3
from datetime import datetime

dynamodb = boto3.resource('dynamodb')
table = dynamodb.Table('ddb-stream-pets')

def lambda_handler(event, context):
    print(event)

    response = table.scan()
    items = response['Items']

    while 'LastEvaluatedKey' in response:
        response = table.scan(ExclusiveStartKey=response['LastEvaluatedKey'])
        items.extend(response['Items'])

    current_time = datetime.utcnow().strftime("%Y-%m-%d %H:%M:%S")

    return {
        'statusCode': 200,
        'body': json.dumps(items),
        'timestamp': current_time
    }
Results
With cache enabled the average response from the API was ~30ms. With the TTL set to 0 (cache disabled) it was ~55ms (pre-warmed Lambda function).
This simple test has shown a performance improvement of 45% by utilizing the API Gateway cache.